Install Windows 10 from USB
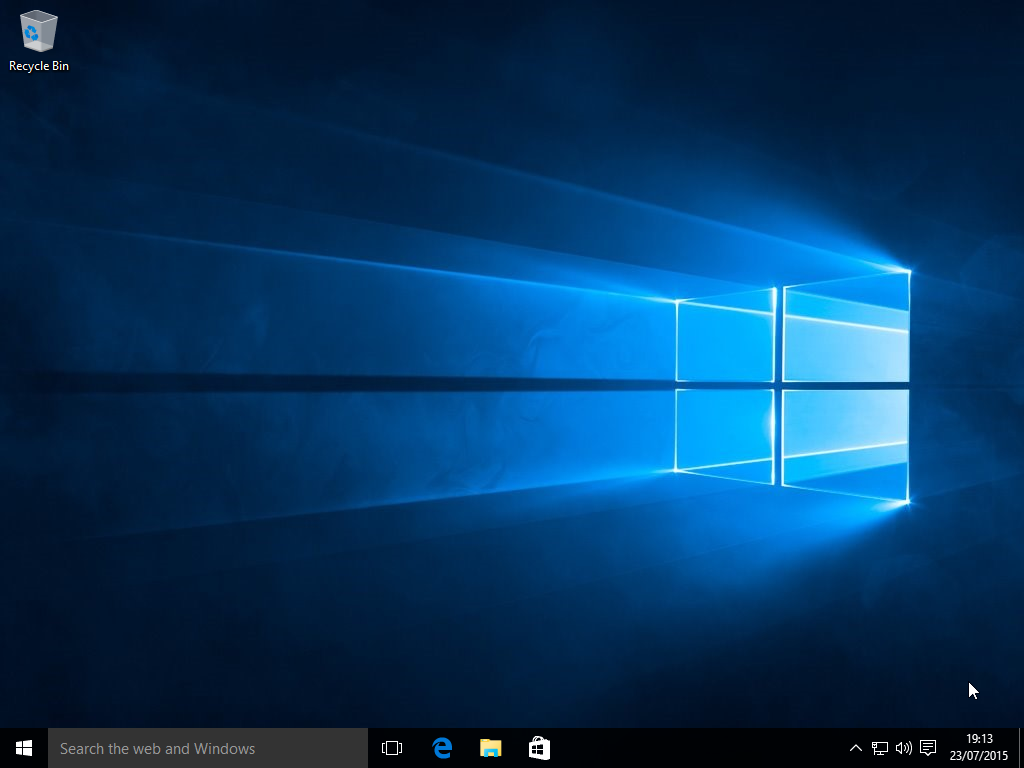
In this guide, we will see how to perform a clean installation of Windows 10 from a bootable USB drive, ensuring that you install the latest official version without any third-party modifications. I will keep updating this guide whenever new ISO images are released, so by following this tutorial you can be sure that you are always installing the most recent ISO, avoiding the need to install hundreds of updates later through Windows Update. At the time of writing, the latest ISO images are version 1703 (Creators Update), released on April 5, 2017.
You can follow this guide to install Windows 10 on computers with Intel or AMD processors, but it will not work on ARM-based devices running Windows Mobile/RT. You can install it on either a solid-state drive (SSD) or a mechanical hard drive (HDD). We will also cover how to install it in BIOS mode or UEFI mode depending on your needs.
Select and Download the Correct ISO Image
In this guide we will use the latest official Microsoft “multiple editions” ISOs. There is one multiple editions ISO for each architecture (x64 or x86) and each language. Each ISO includes all the editions you might need (Home and Pro, both Retail and Volume).
During installation, Windows will ask for a product key. You will need to enter your original key, and the correct edition matching that key will be installed. If you do not have the key at the time of installation, do not worry: as we will see later, it can still be installed using default keys (which only determine the edition to install but do not activate it), and you can activate Windows afterward.
Nowadays, the normal choice is the 64-bit (x64) version. If it is an older system with a processor that does not support 64-bit instructions or has less than 2 GB of RAM, consider installing the 32-bit (x86) version.
For installing Windows in English, download one of these ISOs depending on whether you need x64 or x86:
-
Windows 10 (Multiple Editions), Version 1703 (Updated March 2017) (x64) - DVD (English)
- Version date: 5/4/2017
- MSDN Name: en_windows_10_multiple_editions_version_1703_updated_march_2017_x64_dvd_10189288.iso
- Tech Bench Name: Win10_1703_English_x64.iso
- SHA1: CE8005A659E8DF7FE9B080352CB1C313C3E9ADCE
-
Windows 10 (Multiple Editions), Version 1703 (Updated March 2017) (x86) - DVD (English)
- Version date: 5/4/2017
- MSDN Name: en_windows_10_multiple_editions_version_1703_updated_march_2017_x86_dvd_10188977.iso
- Tech Bench Name: Win10_1703_English_x32.iso
- SHA1: 1AF7B5B5914B718C3F2F6E58907F51C36F8A03C1
For installing Windows in Spanish, download one of these ISOs depending on whether you need x64 or x86:
-
Windows 10 (Multiple Editions), Version 1703 (Updated March 2017) (x64) - DVD (Spanish)
- Version date: 5/4/2017
- MSDN Name: es_windows_10_multiple_editions_version_1703_updated_march_2017_x64_dvd_10204108.iso
- Tech Bench Name: Win10_1703_Spanish_x64.iso
- SHA1: 3AB139DA05FD7E38686EFC24485F432715C454E4
-
Windows 10 (Multiple Editions), Version 1703 (Updated March 2017) (x86) - DVD (Spanish)
- Version date: 5/4/2017
- MSDN Name: es_windows_10_multiple_editions_version_1703_updated_march_2017_x86_dvd_10191796.iso
- Tech Bench Name: Win10_1703_Spanish_x32.iso
- SHA1: FE77B7F2F75894FC0CBD903DFA1CBD36EA00285A
It is no longer possible to download the multiple editions ISOs directly from Microsoft unless you have an MSDN subscription. You can search for the ISOs on Google using their file names or SHA1 hashes.
Another option is to use the Media Creation Tool. Keep in mind that ISOs downloaded with Media Creation Tool are not the multiple editions versions, so you will not be able to follow this guide exactly. For this guide, using the multiple editions ISOs is recommended.
If you want to make sure the ISO was downloaded correctly and has not been modified by third parties, verify its SHA1 hash (for example with HashTab). If the SHA1 reported by the program matches the one listed above, the ISO is correct and you can proceed. If the hash does not match, the file may be corrupted or unofficial.
Create a Bootable USB Drive
Before continuing, keep the following in mind:
- Windows 10 can be installed in BIOS mode or UEFI mode, depending on the motherboard.
- Older motherboards without UEFI only support BIOS mode.
- Modern motherboards with UEFI are usually backward-compatible and support both BIOS and UEFI installation.
- Some UEFI boards only allow installation in UEFI mode, although these are less common.
- The 32-bit ISO cannot be installed in UEFI mode; you need the 64-bit ISO for that.
- Installing in UEFI mode provides several advantages: GPT partition tables, support for drives larger than 2 TB, more than four primary partitions, fast boot, and more.
Once you know which mode you will use, prepare a bootable USB drive so you can boot the Windows installer from it. You will need a USB drive of at least 4 GB or 8 GB depending on whether you install the x86 or x64 version. To create it, we will use Rufus.
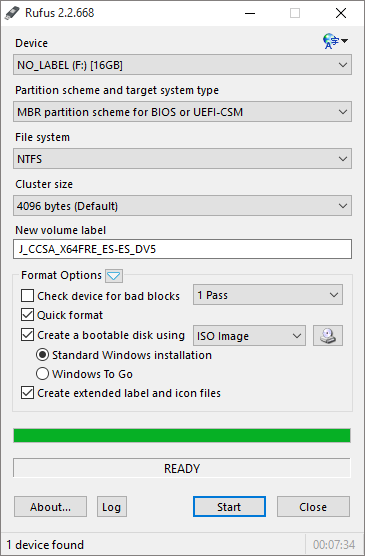
Connect the USB drive before launching the program and configure these options:
- Device: Select the USB drive you want to use. Everything on it will be erased.
- Partition scheme and target system type:
- For UEFI: “GPT partition scheme for UEFI”
- For BIOS: “MBR partition scheme for BIOS or UEFI”
- File system:
- For UEFI: “FAT32”
- For BIOS: “NTFS”
- Check “Create a bootable disk using ISO image” and select the ISO file.
- Leave the rest of the options as default.
Click Start and wait for the process to finish.
Things to Consider Before Starting
Make sure your system meets the minimum requirements for Windows 10 and that all components have Windows 10 drivers available.
Minimum requirements:
- Processor: 1 GHz or faster, compatible with PAE, NX, and SSE2
- RAM: 1 GB (32-bit) or 2 GB (64-bit)
- Storage: 16 GB (32-bit) or 20 GB (64-bit)
- Graphics: Microsoft DirectX 9 graphics device with WDDM 1.0 driver
Keep in mind that all data and programs on the partition where Windows will be installed will be erased. If you convert from one partition table type to another, the entire drive may be wiped. Back up everything important first.
If you have multiple drives, it is recommended to disconnect all of them except the target drive. This prevents accidental data loss and avoids installing the bootloader on the wrong disk.
Optional recommendations:
- Reset BIOS settings to default if you have overclocking enabled.
- Check for BIOS/UEFI or SSD/HDD firmware updates.
- If using SATA, connect the drive to the main Intel or AMD controller instead of third-party controllers.
- Ensure the SATA controller is configured in AHCI mode.
- If using a heavily-used SSD with degraded performance, consider performing a Secure Erase.
Booting the USB Drive
Depending on whether your motherboard has UEFI or not, the process will differ.
Motherboard Without UEFI
In this case, the USB drive will only boot in BIOS mode. Select it from the boot menu (usually F8 or another key depending on the system).
Motherboard With UEFI
If your motherboard has UEFI, it usually allows both BIOS and UEFI installations.
- For UEFI mode, enable options like UEFI Boot and disable Legacy Boot.
- For BIOS mode, do the opposite: enable Legacy Boot and disable UEFI-related options.
When selecting the USB drive in the boot menu:
- If it shows the UEFI prefix, it will boot in UEFI mode.
- Without the prefix, it will boot in BIOS mode.
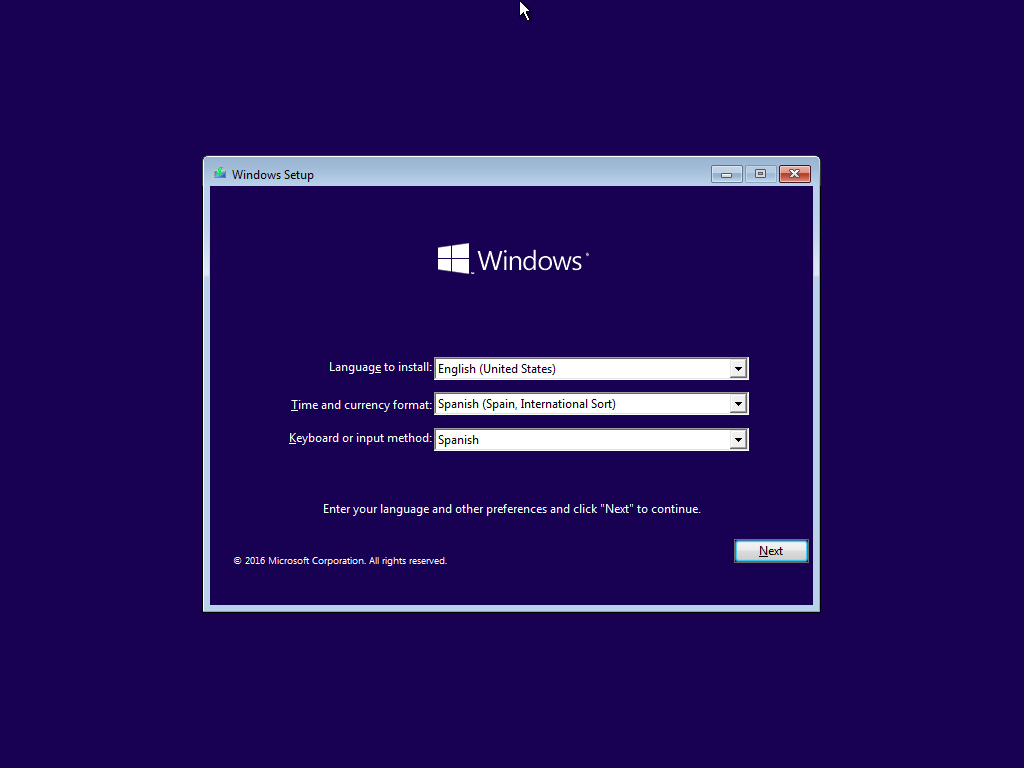
Enter the Product Key
Once booted from the USB drive, the installer will first ask for the product key.
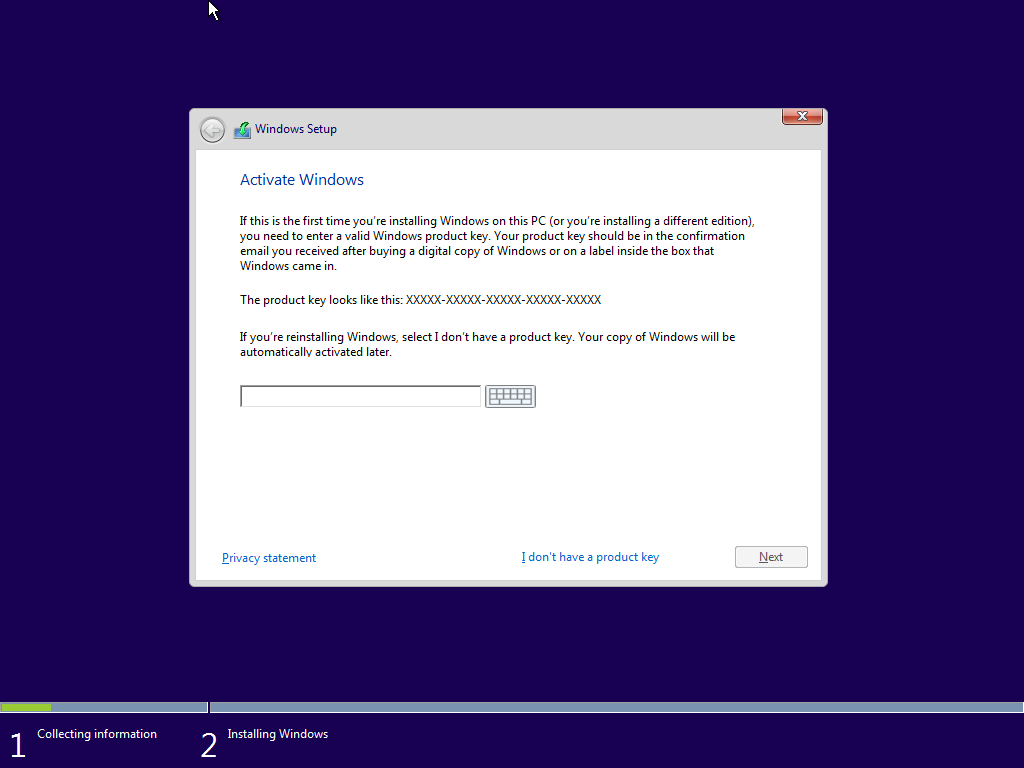
At this point there are three possible cases:
- License detected automatically: usually on branded PCs that came with Windows preinstalled.
- License not detected automatically: enter your original key manually.
- No license available during installation: select I don’t have a product key and activate later.
Installing Windows 10
If asked which type of installation you want, choose Custom to perform a clean installation.
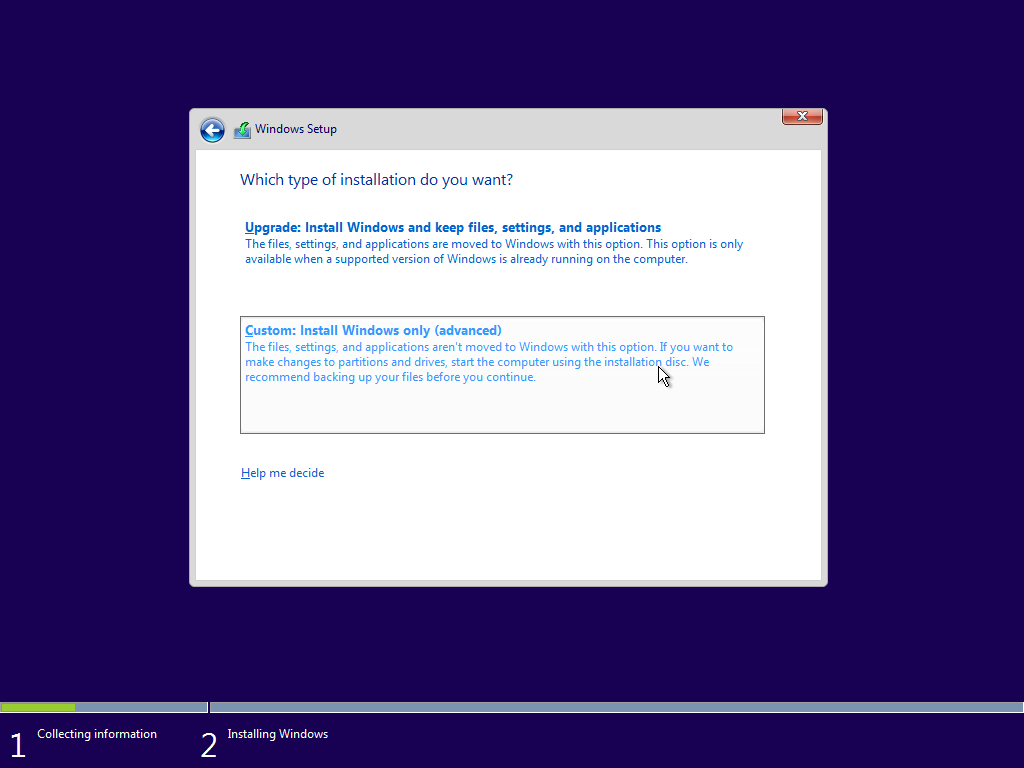
Before selecting the target partition, the drive may need to be prepared in MBR or GPT depending on whether you booted in BIOS or UEFI mode.
If you are unsure which mode you booted in:
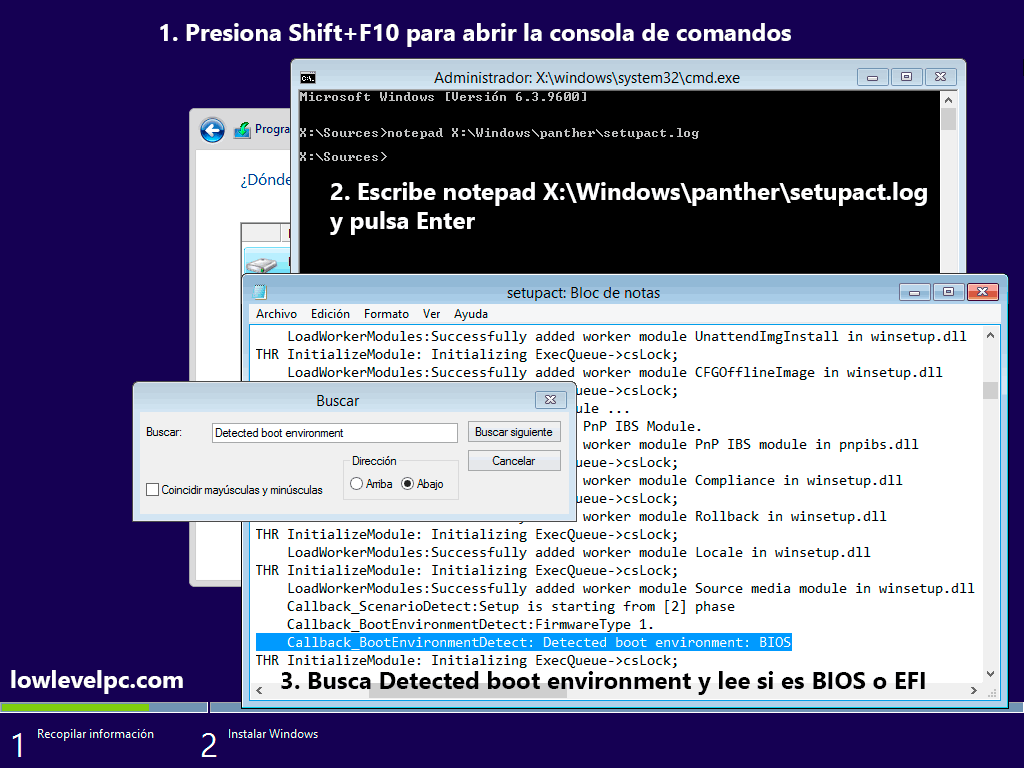
Install Windows 10 in BIOS Mode
If installing in BIOS mode, the target drive should use an MBR partition table.
If it uses GPT, convert it:
diskpart
list disk
select disk X
clean
convert mbr
exit
Refresh the partition list and continue.
Install Windows 10 in UEFI Mode
If installing in UEFI mode, the target drive should use GPT.
If it uses MBR, convert it:
diskpart
list disk
select disk X
clean
convert gpt
exit
Refresh the partition list and continue.
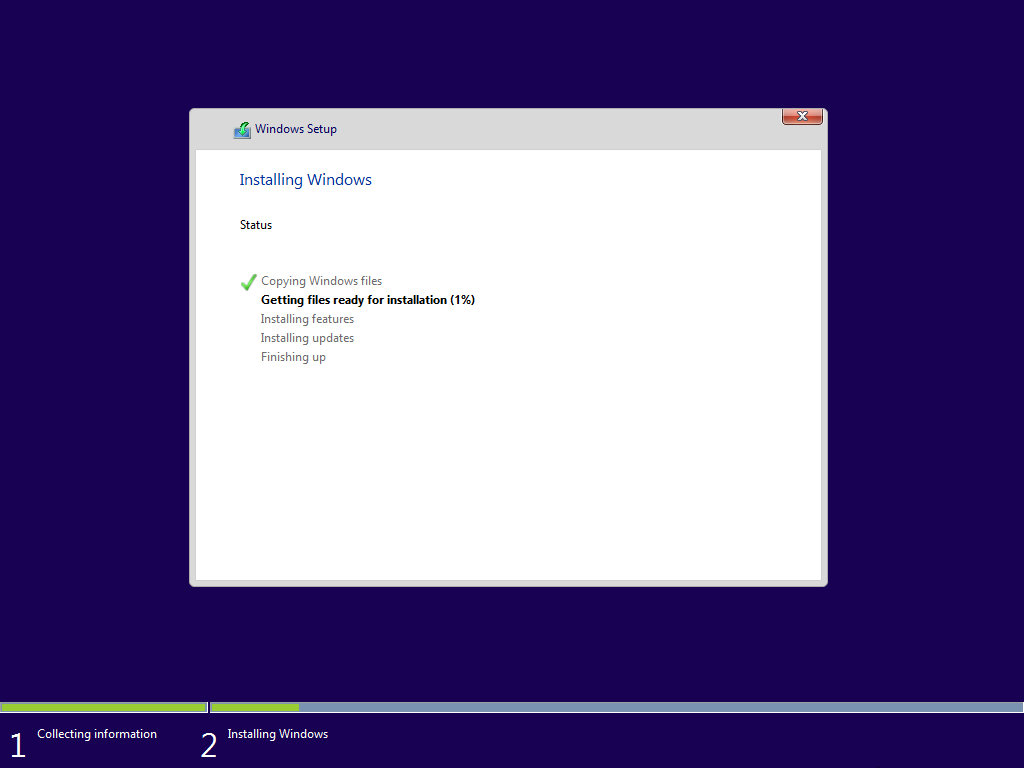
After Installation
When installation finishes, select Customize:
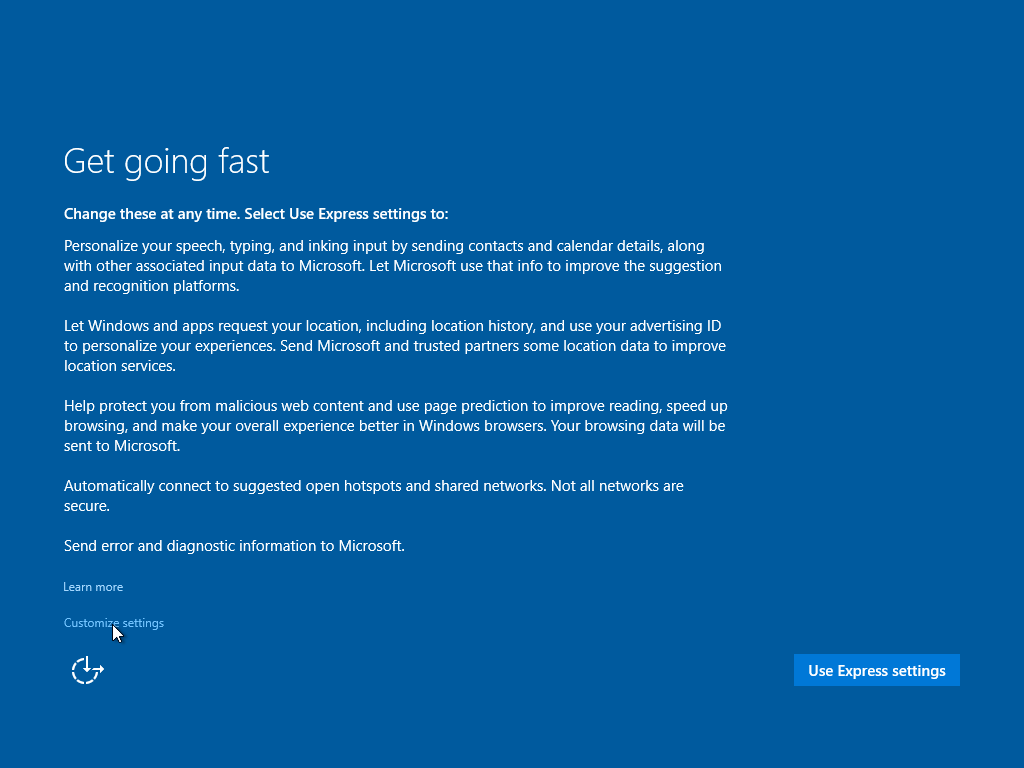
Configure the settings according to your preferences, and shortly afterward you will reach the desktop:
Once Windows is installed:
- Check whether it has activated correctly.
- Install drivers for all system components.
- Use Windows Update for common drivers.
- Download missing drivers from the manufacturer if necessary.
Optional post-installation tasks:
- Customize Settings to your liking.
- Use Ninite to install programs quickly.
- Install Microsoft Office, Google Chrome + uBlock Origin, and 7-Zip.
- Configure OneDrive.
- Customize the Start menu.
- Adjust Control Panel settings such as power options, file explorer visibility, mouse precision, autoplay, and sound settings.
Control Panel
-
System and Security
- Disable automatic restart after system failure.
- Adjust power settings.
-
User Accounts
- Configure User Account Control.
-
Appearance and Personalization
- Customize taskbar and File Explorer behavior.
-
Hardware and Sound
- Adjust mouse pointer speed.
- Configure AutoPlay.
- Disable Windows sounds and configure audio device settings.